


Casio Personal Printer FP-40 Repair
I found this small Casio FP-40 thermal printer in the trash.
It had suffered extreme NiCd battery corrosion damage:

The board with the most damage is responsible for the cassette interface, the battery connection itself and as a junction to the buttons and DIP switches. This was board bypassed by soldering new wiring between the other boards. There was also some damage on the upper right on mainboard, which was repaired by using a Dremel to remove the solder mask, then re-tinning the slightly corroded traces.
Luckily someone already reverse engineered the circuit diagram which helps a lot with restoring the wiring.
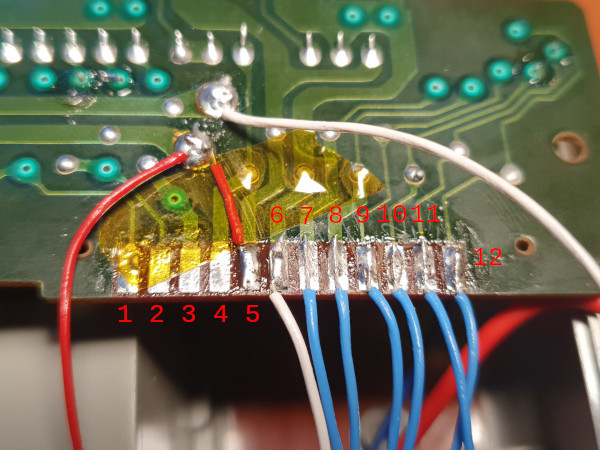
New wiring on the underside of the mainboard:
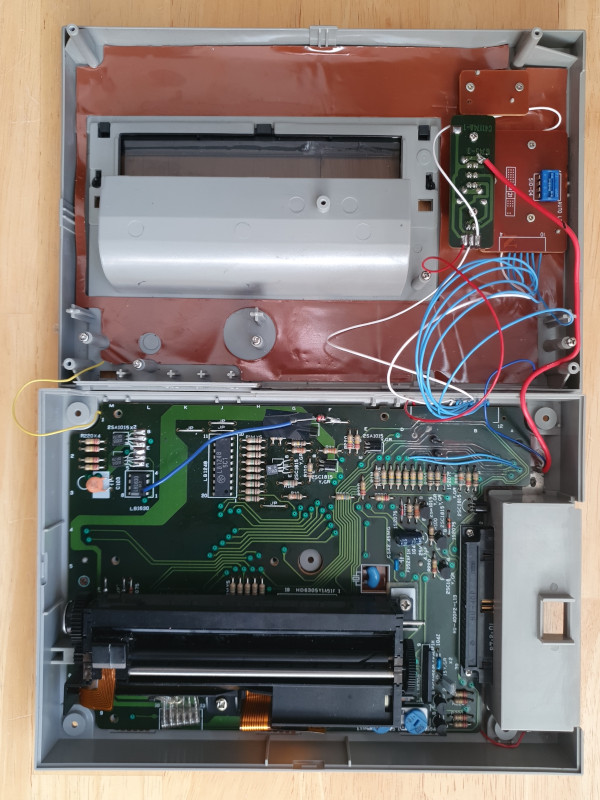
Repair overview with the heavily corroded board (and battery!) now removed:
A connection diagram with the new wiring:
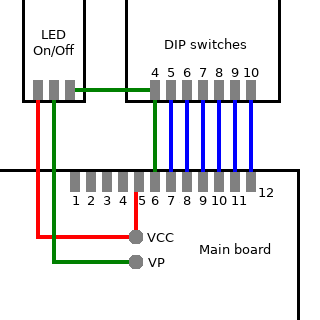
A power source can be connected on the VCC and VP pin headers. I used a current-limiting PSU supplying 4.8V which matches the previous 4x1.2V supply from the NiCd cells. I also tried using the 5V rail from a standard PC PSU but this caused some malfunction so not recommended.
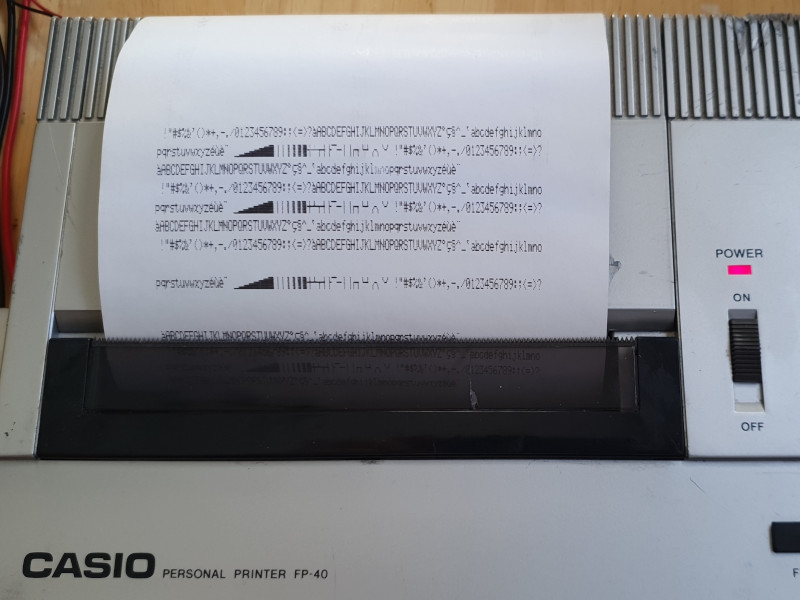
Printing of the test pattern, by holding down the "FEED" button while powering on: