


Amiga 500 with the Framemeister
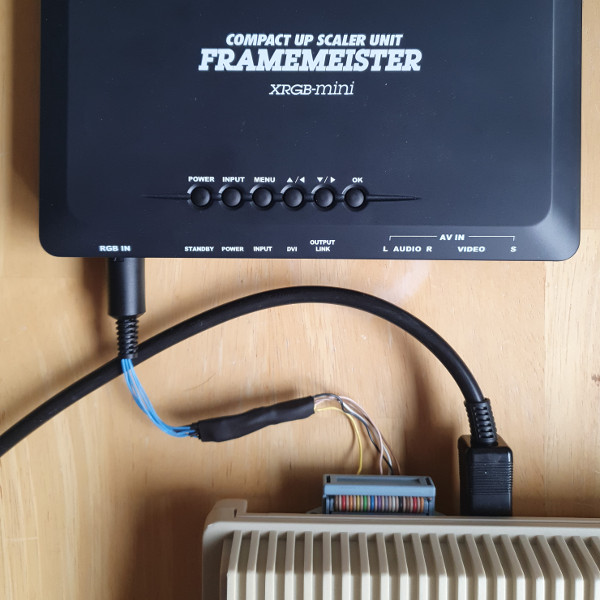
Here is how I connected the Amiga 500 to the Micomsoft XRGB-mini Framemeister to be able to get color graphics on a modern display through HDMI.
The tricky part is getting a "DB23" connector, but I ended up using a regular DB25 connector (made from plastic) and shaving off part of it to make it fit into the Amiga 500. The mini-DIN connector on the Framemeister only accepts composite sync (not separate horizontal and vertical which is more common) but this is available on one of the pins on the Amiga. However, it is a 5V TTL level signal which is a little bit too hot so it's recommended to reduce this with a resistor. I ended up using two 360 Ohm resistors in series at 720 Ohm since that is what I found in stock at the moment. Some diagrams I found online claim that ground should be taken from pin 16 from the Amiga, but this did NOT work for me. Pin 19 which is composite video ground worked fine.
Here is the cable pin out:
|----------------|-------|---------|--------------|
|                | Amiga |         | Framemeister |
| Signal         | DB23  |         | Mini-DIN     |
|----------------|-------|---------|--------------|
| Red            | 3     |         | 8            |
| Green          | 4     |         | 7            |
| Blue           | 5     |         | 6            |
| Composite Sync | 10    | 720 Ohm | 3            |
| Ground         | 19    |         | 4            |
|----------------|-------|---------|--------------|
When testing the connections with clip leads I got some "jail bars" (faint traces of vertical lines) on the display, but these more or less disappeared when I soldered everything together properly. Not sure if that was caused by general noise or by poor clip lead cables.
The finished cable connected: