


Toshiba Satellite Pro 410CDT Tweaks
I got hold of an old Toshiba Satellite Pro 410CDT laptop with a Pentium 90MHz processor, which I have cleaned up and refurbished. Since I already got tons of Linux boxes I figured to use this a "DOS Gaming Laptop" instead. It has a Sound Blaster compatible ESS688 sound chipset and a Adlib compatible FM synthesizer, making this perfect for that use.
Important notice! The internal batteries in this had already started to shown signs of leakage, the typical turquoise spots:
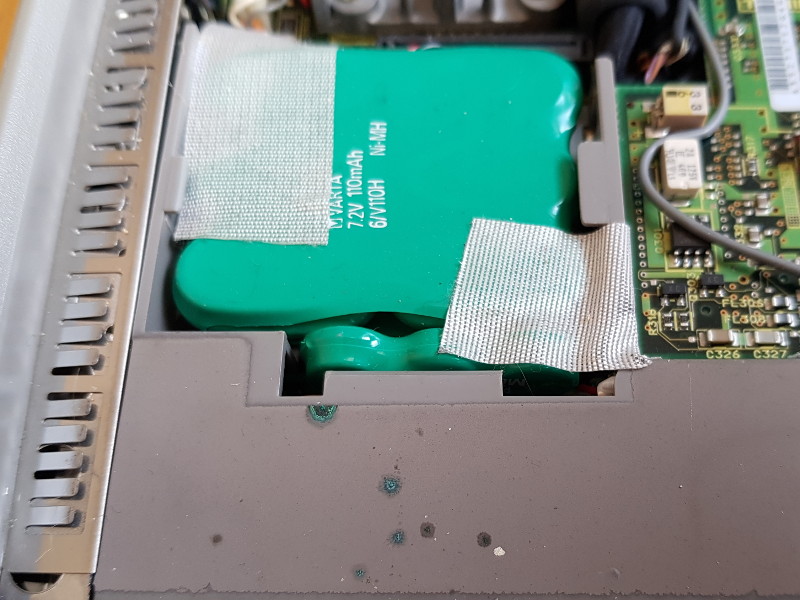
I immediately removed the batteries and cleaned up the spots with vinegar. It will now complain about lost CMOS settings every time, but I can live with that for now.
Another challenge is that this laptop has no floppy drive, since that is swappable with a CD-ROM drive that I (only) got instead. To be able to install DOS I used QEMU to install it on a virtual drive, then removed the original hard drive from the laptop and DD'd over the virtual drive to it.
I knew the hard drive was 815394816 bytes, meaning 1592568 512-byte sectors, so a virtual drive can be made like this:
dd if=/dev/zero of=Toshiba_DOS.dd bs=512 count=1592568
QEMU is launched like this:
qemu-system-i386 -drive format=raw,file=Toshiba.dd -cpu pentium -m 32 -monitor stdio -fda DOS_Floppy_1.dd
One can then use the QEMU monitor to change and eject virtual floppies like so:
change floppy0 DOS_Floppy_2.dd
change floppy0 DOS_Floppy_3.dd
eject floppy0
Afterwards it is also possible to loopback mount he virtual hard drive to put more stuff on there, like tools and games. Since the first partition starts at sector 63, an offset of 32256 bytes must be used:
sudo mount -o loop,offset=32256 Toshiba_DOS.dd /mnt/loop/
I used one of those USB-to-IDE adapter and the virtual hard drive is typically DD'd back just like this:
dd if=Toshiba_DOS.dd of=/dev/sdd bs=512 status=progress
Finally, for reference, here is the "AUTOEXEC.BAT" file I ended up using for the laptop:
C:\DOS\SMARTDRV.EXE /X
@ECHO OFF
PROMPT $p$g
PATH C:\DOS;C:\VI;C:\MSKERMIT;C:\PKZIP
SET TEMP=C:\DOS
MODE CON CODEPAGE PREPARE=((850) C:\DOS\EGA.CPI)
MODE CON CODEPAGE SELECT=850
LOADHIGH=C:\DOS\KEYB NO,,C:\DOS\KEYBOARD.SYS
LOADHIGH=C:\DOS\DOSKEY.COM
LOADHIGH=C:\DRIVERS\MOUSE.COM
LOADHIGH=C:\DRIVERS\MSCDEX.EXE /D:MSCD001 /L:D
C:\ESSUTIL\ESSVOL.EXE /V:8 /L:8 /W:8 /M:0 /C:8 /S:8
SET BLASTER=A220 I7 D1 T6 P330 H5
And the "CONFIG.SYS" file:
DEVICE=C:\DOS\HIMEM.SYS
DEVICE=C:\DOS\EMM386.EXE NOEMS
DOS=HIGH,UMB
COUNTRY=047,,C:\DOS\COUNTRY.SYS
DEVICEHIGH=C:\DOS\SETVER.EXE
DEVICEHIGH=C:\DOS\DISPLAY.SYS CON=(EGA,,1)
FILES=50
BUFFERS=10,0
DEVICEHIGH=C:\DRIVERS\OAKCDROM.SYS /D:MSCD001